What are Girts?
Tell me more about Girts!
Oh my look at those Girts!
When someone says pole barn, there are a number of ideas that run through my mind. Fast to construct, you don’t have to have a foundation because the poles are the foundation, metal, noisy in the rain, perfect for the ranch, you want an ultimate mancave, build a pole barn with a concrete floor. Expanding on the visual aspect of a pole barn, you think of poles in the ground and bypass girts on the walls of the building.
Traditional Bypass Girts
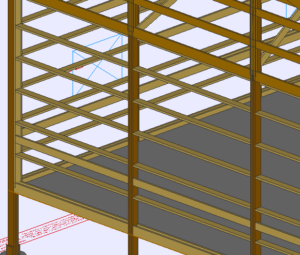
Bypass girts are installed on edge, on the outside of columns with a spacing of 2’ to 4’. They are typically 2×4’s or 2×6’s. They make great ladder rungs when working on the building. And are super easy to hit with your screws. Another option is available if you set your posts using brackets on a foundation. The entire wall can be built on the ground and then raised into place.
Upgraded Bookshelf Girts
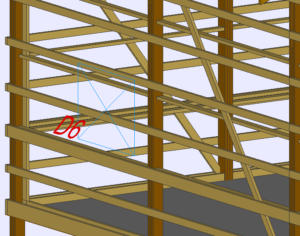
Now there is a second, less known girt style. This style is called a bookshelf girt. The bookshelf girt is installed horizontally in between the posts, and flush with the edges of the columns. This style of girt has several benefits including not requiring secondary framing for insulation and liners, the strength of the width of a 2×6 is perpendicular to the diaphragm strength of the metal creating a stronger building. An added bonus includes the diagonal bracing on the walls is not required.
Finally, What Girt Should I Choose?
At no point do i want to tell you what to do. You need to take a good long look at what you want to do with your building in the long run? What is the main reason you are building a pole barn? What are some of the features that are non negotiable? But in the end, there should still be one clear victor unless you truly have little purpose for the future of your building.
We have discussed several benefits and drawbacks for both styles of girts. So which one is the preferred choice. And that is a simple choice. The added value of going with the bookshelf girt significantly outweigh the marginal cost savings and speed of install provided with bypass girts.
Drawbacks of Bookshelf
Some of the drawbacks from bookshelf girts is that you only have 1 ½” to hit with your screw lines. The boards tend to sag and have to be straightened when you install the metal, additional bracing is required for walk door and window openings. And the installation cost can be higher. Finally, you want to avoid using bookshelf girts as a ladder to work on the building. The girts oriented to be weak when stood on and have a tendency of pulling the fasteners out and falling off, and your left free falling to the next girt. So professionals and DIY guys should most surely invest in an off-road scissor lift to complete the framing at the very least.
Ask a Veteran of Mistakes
Turn back now – the following conversation is going to be a mix of a rant and a beautiful transition from naïve, to enlightened contractor.
Now, when I started, I had to teach myself a lot of the tips of the trade, there wasn’t any RR Building videos to watch. One of the first upgrades that I fell in love was using a bookshelf girt vs doing the bypass girt. When I first started, doing the bookshelf girt was truly a hassle over building with a bypass. A bypass is easy, you can hide mistakes, you can modify them easily, and you don’t have to be accurate and still be able to pre-punch your metal siding.
What I wish I had Known
Oh, how I wish I knew what I know now. Mr. Kremer always says you don’t know what you don’t know. So back to girts, the crew has it so easy. We now make sure we are dead set on our elevation on each corner of the building. And then pull stringlines to set our elevation of our grade boards. Then we use story boards that allow us to just set the girts in and nail them off. This keeps them nice and straight, and are perfectly uniform. This allows you to pre-punch the metal so your screws are in a nice straight line. (as long as you square your building properly, we’ll go through this further in future blogs.) This method allows the crews to get all the girts installed in less than a day versus before when it took several days, multiple stringlines, and there was still room at each column for human error. Plus is required a minimum of two guys to install versus being able to do the same work more efficiently with just one guy.
Hey don’t just trust me, check out Lester’s website to learn more about the different types of framing. Framing with Lester Buildings